iZySolutions - Documentation
IWICATALOG - Creating a lens: Manufacturing grids 🚧
The Grids tab allows you to create, modify, remove and visualize the manufacturing grids of a lens.
The display and input of corrections can be done either in positive cylinder (by default) or in negative cylinder. If you wish to use only negative cylinder input, please ask us and we will modify your company settings accordingly. This will display your default grids in negative cylinder.
Two sub-tabs are available:
Manufacturing grid: to inform/visualize the manufacturing grids of the current lens.
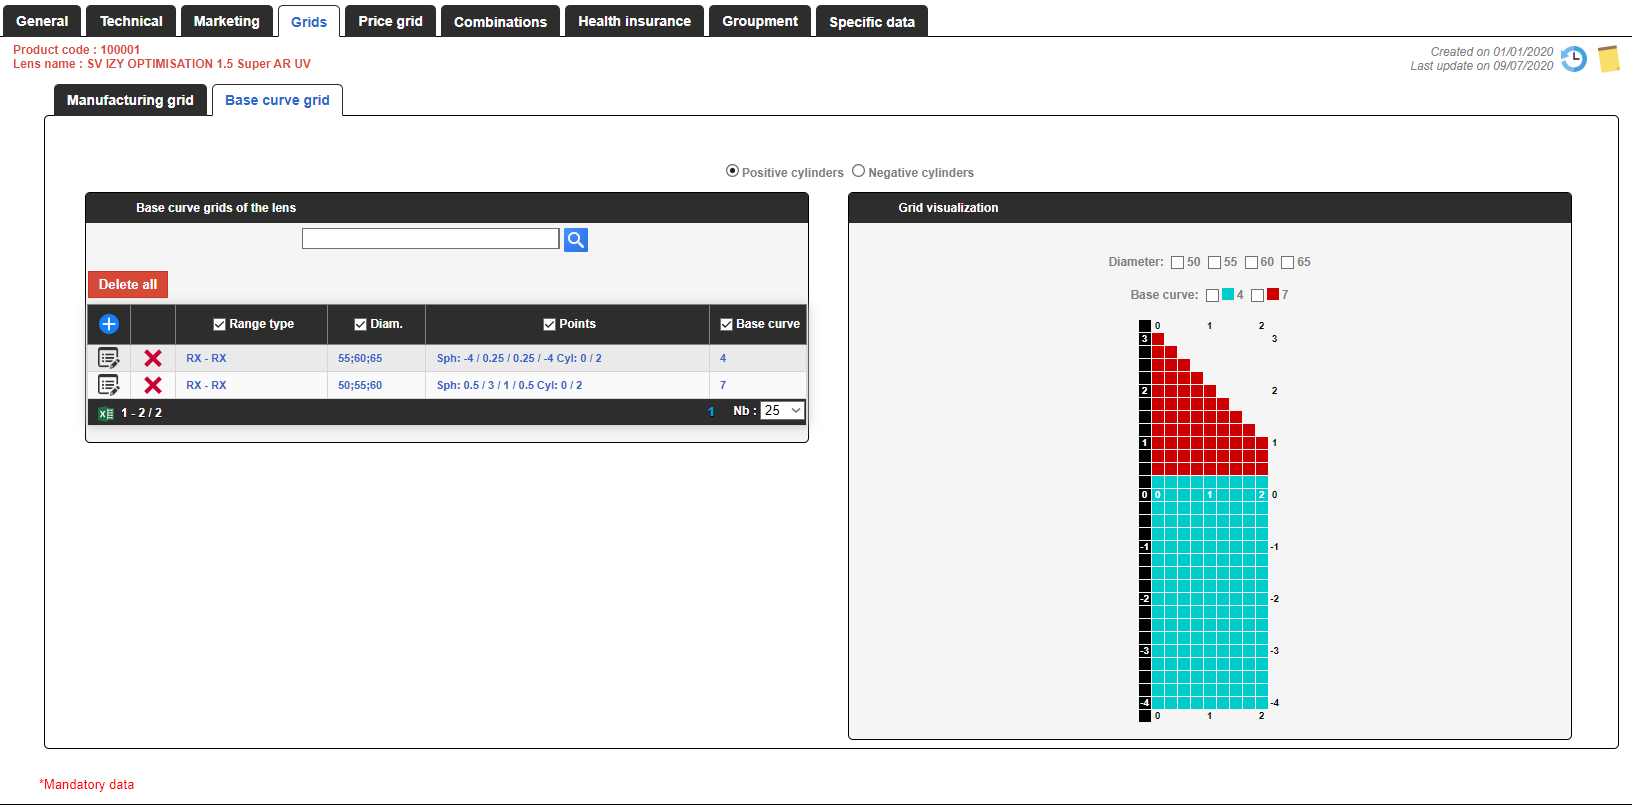
Base curve grid: to fill in/view the base curve according to the powers of the current lens.
The display priority of the grids depends on the diameters. The larger the diameter, the more it will be highlighted.
Actual manufacturing grid | Base curve grid |
|---|
🙋 Manufacturing grids
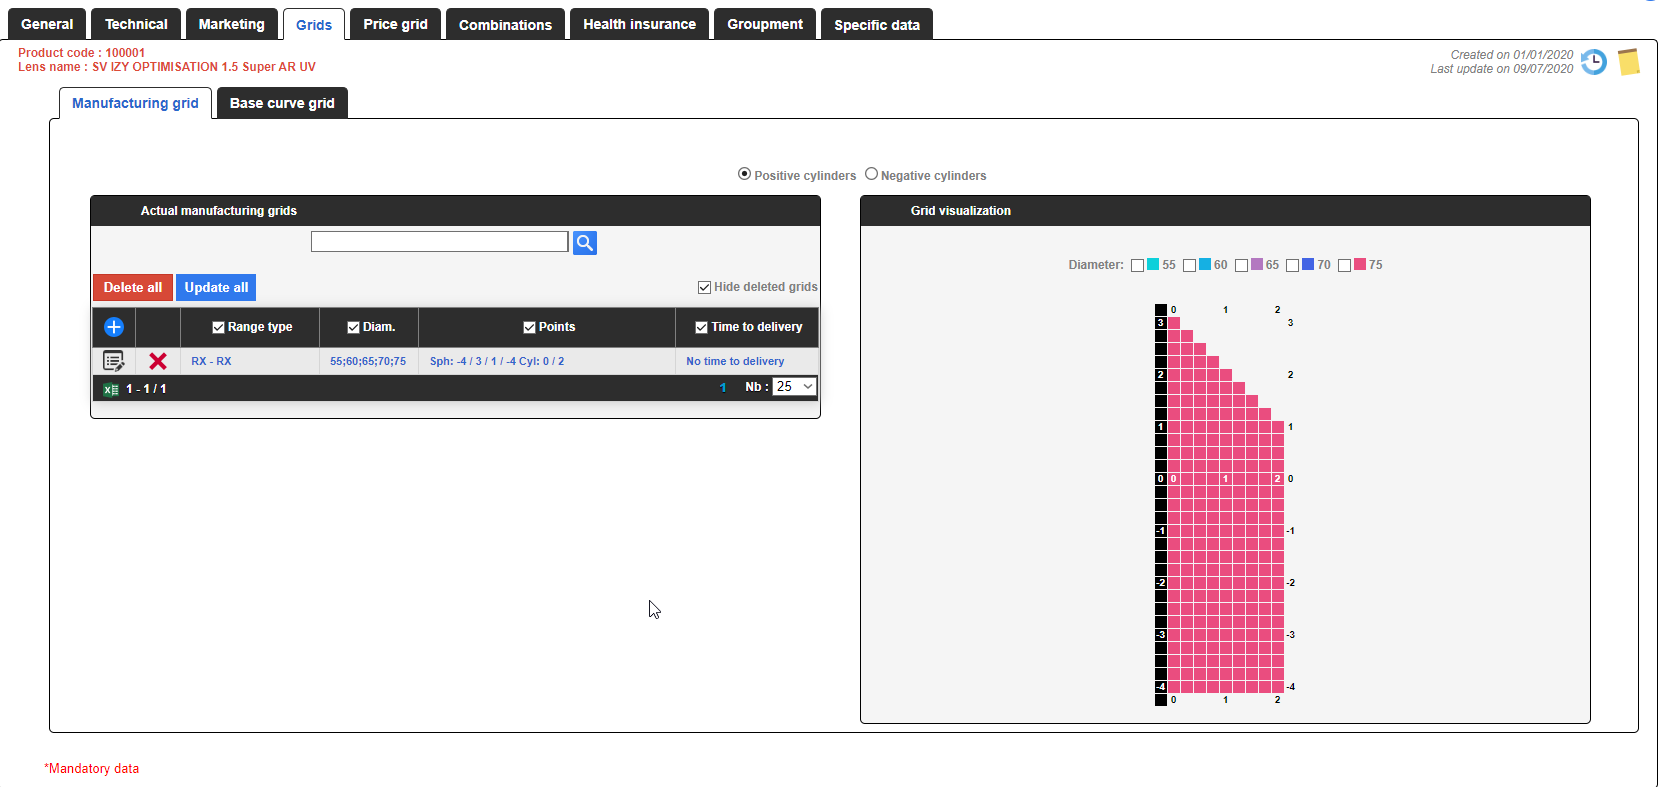
The table in the Manufacturing grids frame displays all main details of your lens.
By default all deleted grids are hidden.
The red Delete all button is used to delete all visibles manufacturing grids in the table due to filters for example.
The blue Update all button is used to modify small parts of the grid definition such as:
The grids range of the lens (for a change of range for example)
The minimal, maximum as well as the step additions.
The first and last validity dates
The balance lens availability (Yes/No)
The step to use in the catalog
If there is a discount on the lens (Yes/No) - dedicated to SF6 only
The blue + button allows to add a new manufacturing grid definition (see the right side of the table below).
The item showing a note allows to edit the manufacturing grid definition (see the right side of the table below).
The table showing a manufacturing grid list allows to visualize the lens grids.
The following columns allows to:
Range: to see the manufacturing lens range.
Diam.: to visualize all the available diameters for a for the same grid definition.
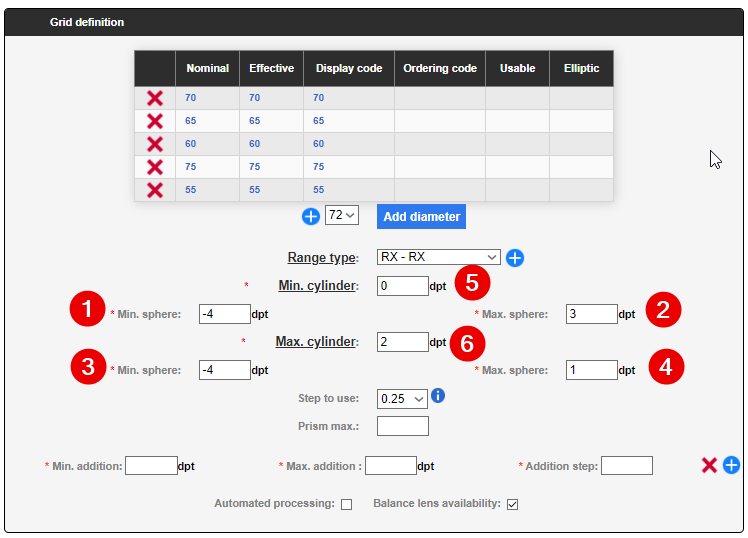
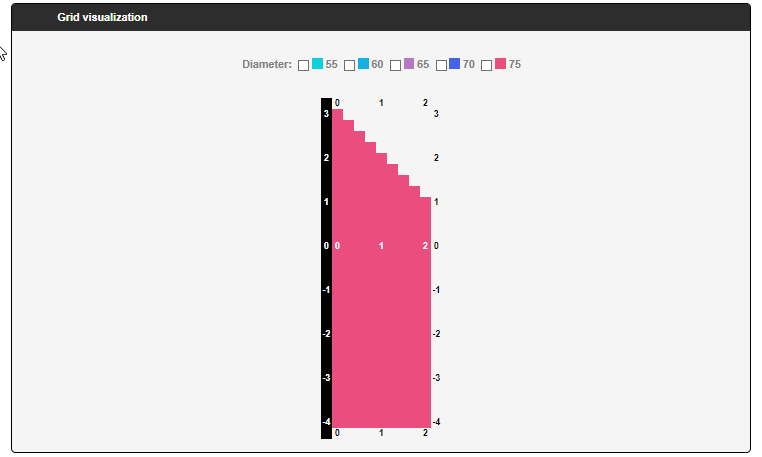
Points: to see the terminals indicated in the grid. See in the example below how to translate the information (in the direction of reading):
Sph: -4 / 3 / 1 / -4 Cyl: 0 / 2
-4 : Sphere min. 1
3 : Sphere max. 2
1 : Sphere max. 3
-4 : Sphere min. 4
0 : Cylinder min. 5
2 : Cylinder max. 6
Time to delivery: to visualize what is the delay applied without editing the grid.
List of the available manufacturing grids Modification en masse d’une partie des grilles du verre | Editing a manufacturing grid |
|---|
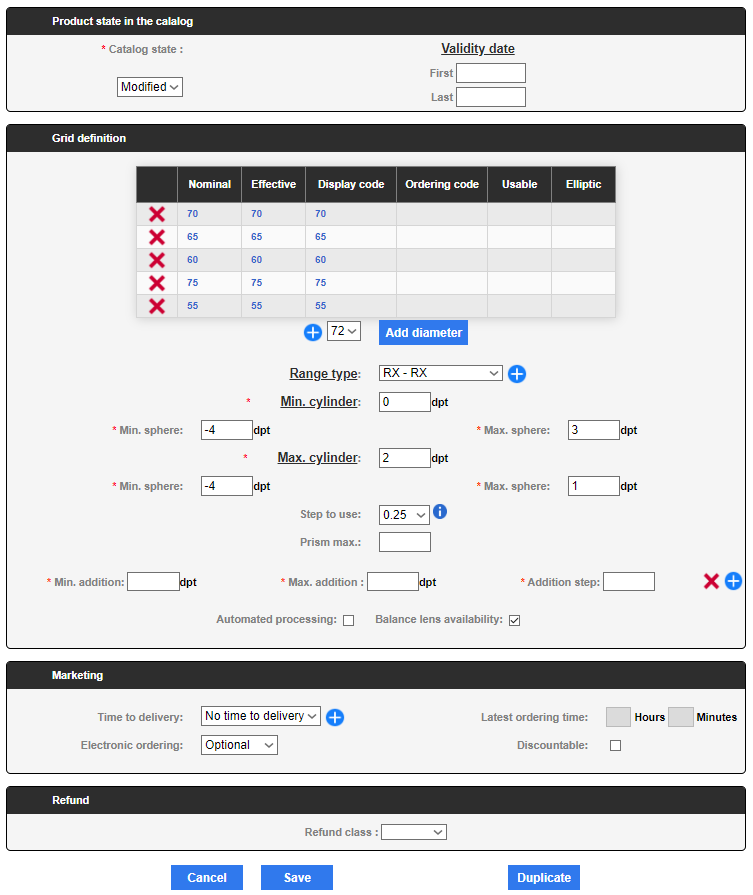
🖌️ Editing a manufacturing grid
State in the catalog
In this view, you can enter the status of the edited grid. See the documentation: IWICATALOG - Status and situation of the products
Grid definition
In this part you can indicate the datas of your manufacturing grid.
Chose the available diameters in your grid. The list suggest the existing diameters in the parameters. To add one or more diameter(s) on the grid, you must click on the blue Add diameter button. The blue + button allows to add a new diameter that doesn't exist already. For further information, you can go on the following page: IWICATALOG - Parameters: Grids tab
Indicate the manufacturer grid of the lens. If the range does not exist you can click on th blue + button to create a new one or follow this link: IWICATALOG - Parameters: Grids tab
Enter the minimal and maximum terminals of the spheres and the cylinders.
Specify the used step
Indicate the maximum prism (only for the SF6 that will allow to define the values of different prisms according to manufacturing grids)
Entre the minimum and maximum additions and the step (according to the lens type)
Automatic processing: Yes/No indicator
Possibility of balancing: Yes/No Indicator
Warning
We recommend to create only one production range per lens. Not all optician software can integrate catalogs with multi-range lenses.
The step of the manufacturing grid inférieurs à 0.25 ne seront pas indiqués dans les catalogs Optimeyes car ce dernier ne permet pas de les interpréter. Un conversion en pas de 0.25 sera appliquée lors de l’export.
How to enter the terminals of the manufacturing grids?
The table below will help you to better understand the manufacturing grids by showing you what values are impacted when you enter the terminals of a grid.
If you used the following sequence, some fields will be automatically calculated at the time of entry:
Minimal cylinder
Minimal sphere. 1 : the minimal sphere 4 will be automatically entered without slope calculation
Maximum sphere 2
Maximum cylinder 6 : the maximum sphere 3 will be automatically calculated while taking into account the slope. This is an input help for most production grids.
There is a blue + button in the additions line. This one allows you to put several addition lines in case you have addition steps according to its power.
Marketing
In this part you will inform:
A time to delivery: to indicate a time to delivery to the optician. We advice to put your longest time to delivery for the lens. A time to delivery indicated in the associated supplement will be added.
The teletransmission (Opto11 : #184, SF6 : 27) : allows you to indicate if the grid can be ordered in EDI only, if it is optional (in EDI or by another means (Fax, tel, ...)) or if the order is not possible in EDI. By default we put optional.
The deadline : to specify the ultimate hour and minutes to order. Take into account when you indicate a time to delivery.
If there is a discount on the lens (SF6) : Yes/No indicator
Refund
Allows to indicate the class of the refund for a particular grid. The lens could be a class A and the grid a class B.
Warning
🙋 The base curve grids
To fill in this part is identical to that of the manufacturing grids except that you will have to enter the necessary information for the bending bases by ticking the desired value(s). If the bending base is not available, you can create a new one by clicking on the blue + button. You can also go to: IWICATALOG - Parameters: Grids tab
© 2018 iZySolutions
